Sending MIDI to hardware synths
There are plenty of synthesizers and modular synthesizer modules that allow you to send MIDI information like notes and CC messages to control parameters (like control voltage). Depending on the MIDI implementation of your synth or module, you can do a lot!
Check out the code examples for the Volca FM and Volca Sample - the first works on one channel and the second one works on 10 channels. You can start with one of these examples and change MIDI notes, channels and CC messages according to the MIDI implementation of your device.
If you want to do this wirelessly (for example because you’re wearing it), you need two MIDI Madness Makers: one to connect to your synthesizer, the other to wear and to send the touch data to the one connected to the synth. Or you need a long MIDI cable :)
MIDI TRS
Depending on the hardware synth you have, you may need a different MIDI cable. The most common (and current MIDI standard) is Type A. This is also how the MIDI Madness Maker is set up. There is also a type B, which flips the source and sink ([https://minimidi.world/] explains it nicely). This is a little annoying, because it means that you may need a different cable depending on which synth you have, but luckily you don’t need to resolder your MIDI Madness Maker if you want to use a different synth ;).
This is where we buy our MIDI-TRS cables: https://www.thonk.co.uk/shop/befaco-midi-trs-adaptor-cables/ (you can also get them at Thomann).
If you have a synth that uses a TRS input as well, you can use a regular audio cable (or a TRS-TRS MIDI cable if you want to be fancy, like this one). If you have a type B TRS input, you can use a TRS-A/TRS-B dongle which flips the tip and the ring for you (like this one). Alternatively, you can do some hacking on an audio cable by cutting the tip and ring wires, connecting the tip to the ring wire and vice versa (always check with a multimeter if you did it correctly).
Examples
MIDI with Volca FM
MIDI with modular
Sending MIDI wirelessly to your computer
There are multiple ways to turn your MIDI Madness Maker into a Bluetooth MIDI keyboard! The code used for the different examples is the same (MIDI-madness-BLE-keyboard.ino). Here the focus is on sending MIDI wirelessly to computers.
Libraries (this part you only need to do once)
You need to start by installing the BLE-MIDI library by Lathoub. Make sure you do NOT install the other suggested libraries; if you have additional BLE libraries compilation may fail so uninstall those if you have them :)
boards:
| esp32 by Espressif Systems | 3.1.3 |
libraries:
| BLE-MIDI by lathoub | 2.2 |
| MIDI Library by Francois Best, lathoub | 5.0.2 |
To make it work with ESP32, you need to change line 116 in BLEMIDI_ESP32.h (Arduino/libraries/BLE-MIDI/src/hardware/BLEMIDI_ESP32.h). Add .c_str() at the end of the line, so it looks like this: std::string rxValue = characteristic->getValue().c_str();. What you can also do is just replace the entire BLE-MIDI library with this BLE-MIDI folder, there it’s already implemented (just unzip into your Arduino/libraries folder).
MidiMadnessMaker library by Bart Jakobs
Programming genius Bart Jakobs also made a nice library to use with the MIDI Madness Maker that sends MIDI notes and CC info wirelessly to your phone apps. Check it out here; there is also a code example.
Alternatively, you can use the BLE keyboard code in the Arduino (Code) folder.
Sending MIDI wirelessly to your computer
Usually you need to connect a MIDI keyboard via USB when you want to connect it to your computer, but you can also do this wirelessly! With this functionality, you can send MIDI to browser-based apps like https://midi.city/ (works best on Chrome/Safari). Make sure Bluetooth is turned on.
Steps (Windows)
-
Install BLE-MIDI Connect. You can download the free trial, it has no restrictions (but if you will use it a lot, you can buy it, since it’s only the price of a cup of coffee and the developers deserve coffee). This software is used to connect to the BLE device. You need to log in with a Microsoft account to download it.
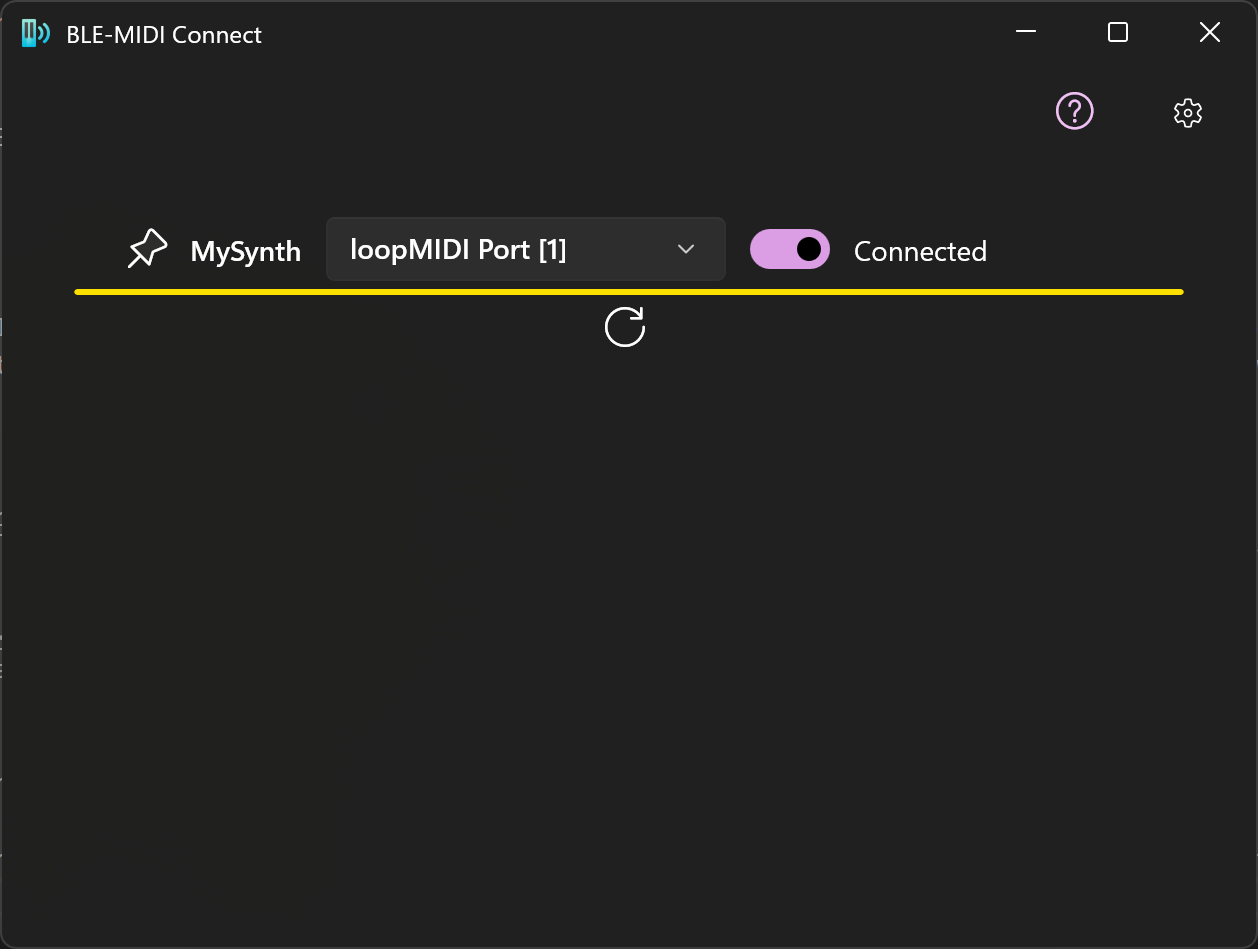
-
Install LoopMIDI. This software is used to connect the BLE device to a virtual port, so that (web) apps on your computer can easily recognize it as a MIDI keyboard.
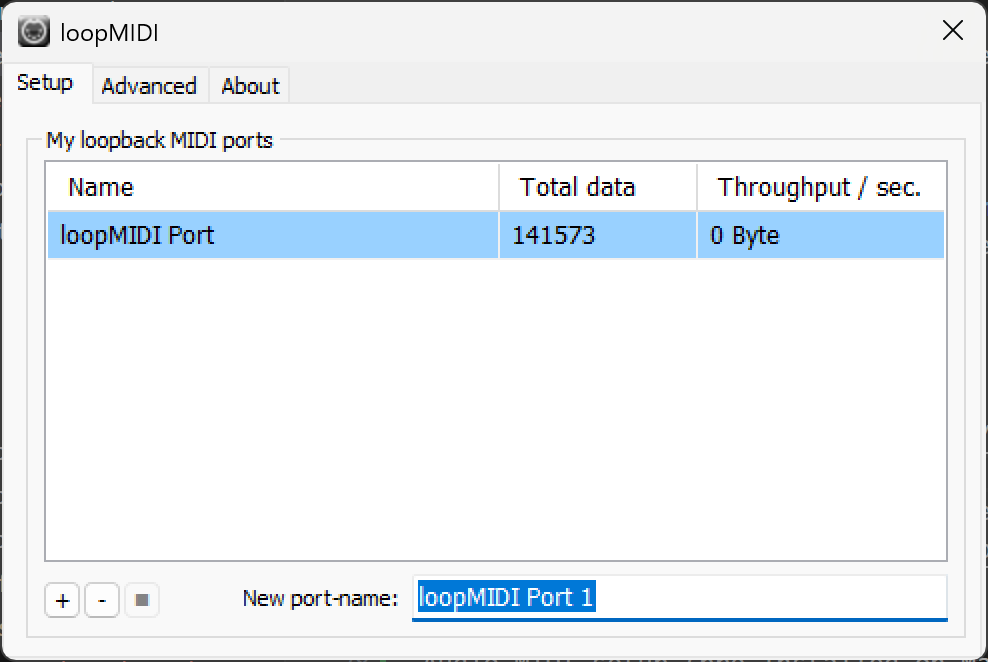
Steps (Mac) Audio MIDI setup (pre installed on Mac): enable Bluetooth MIDI in the audio/MIDI setup
Now you can go to
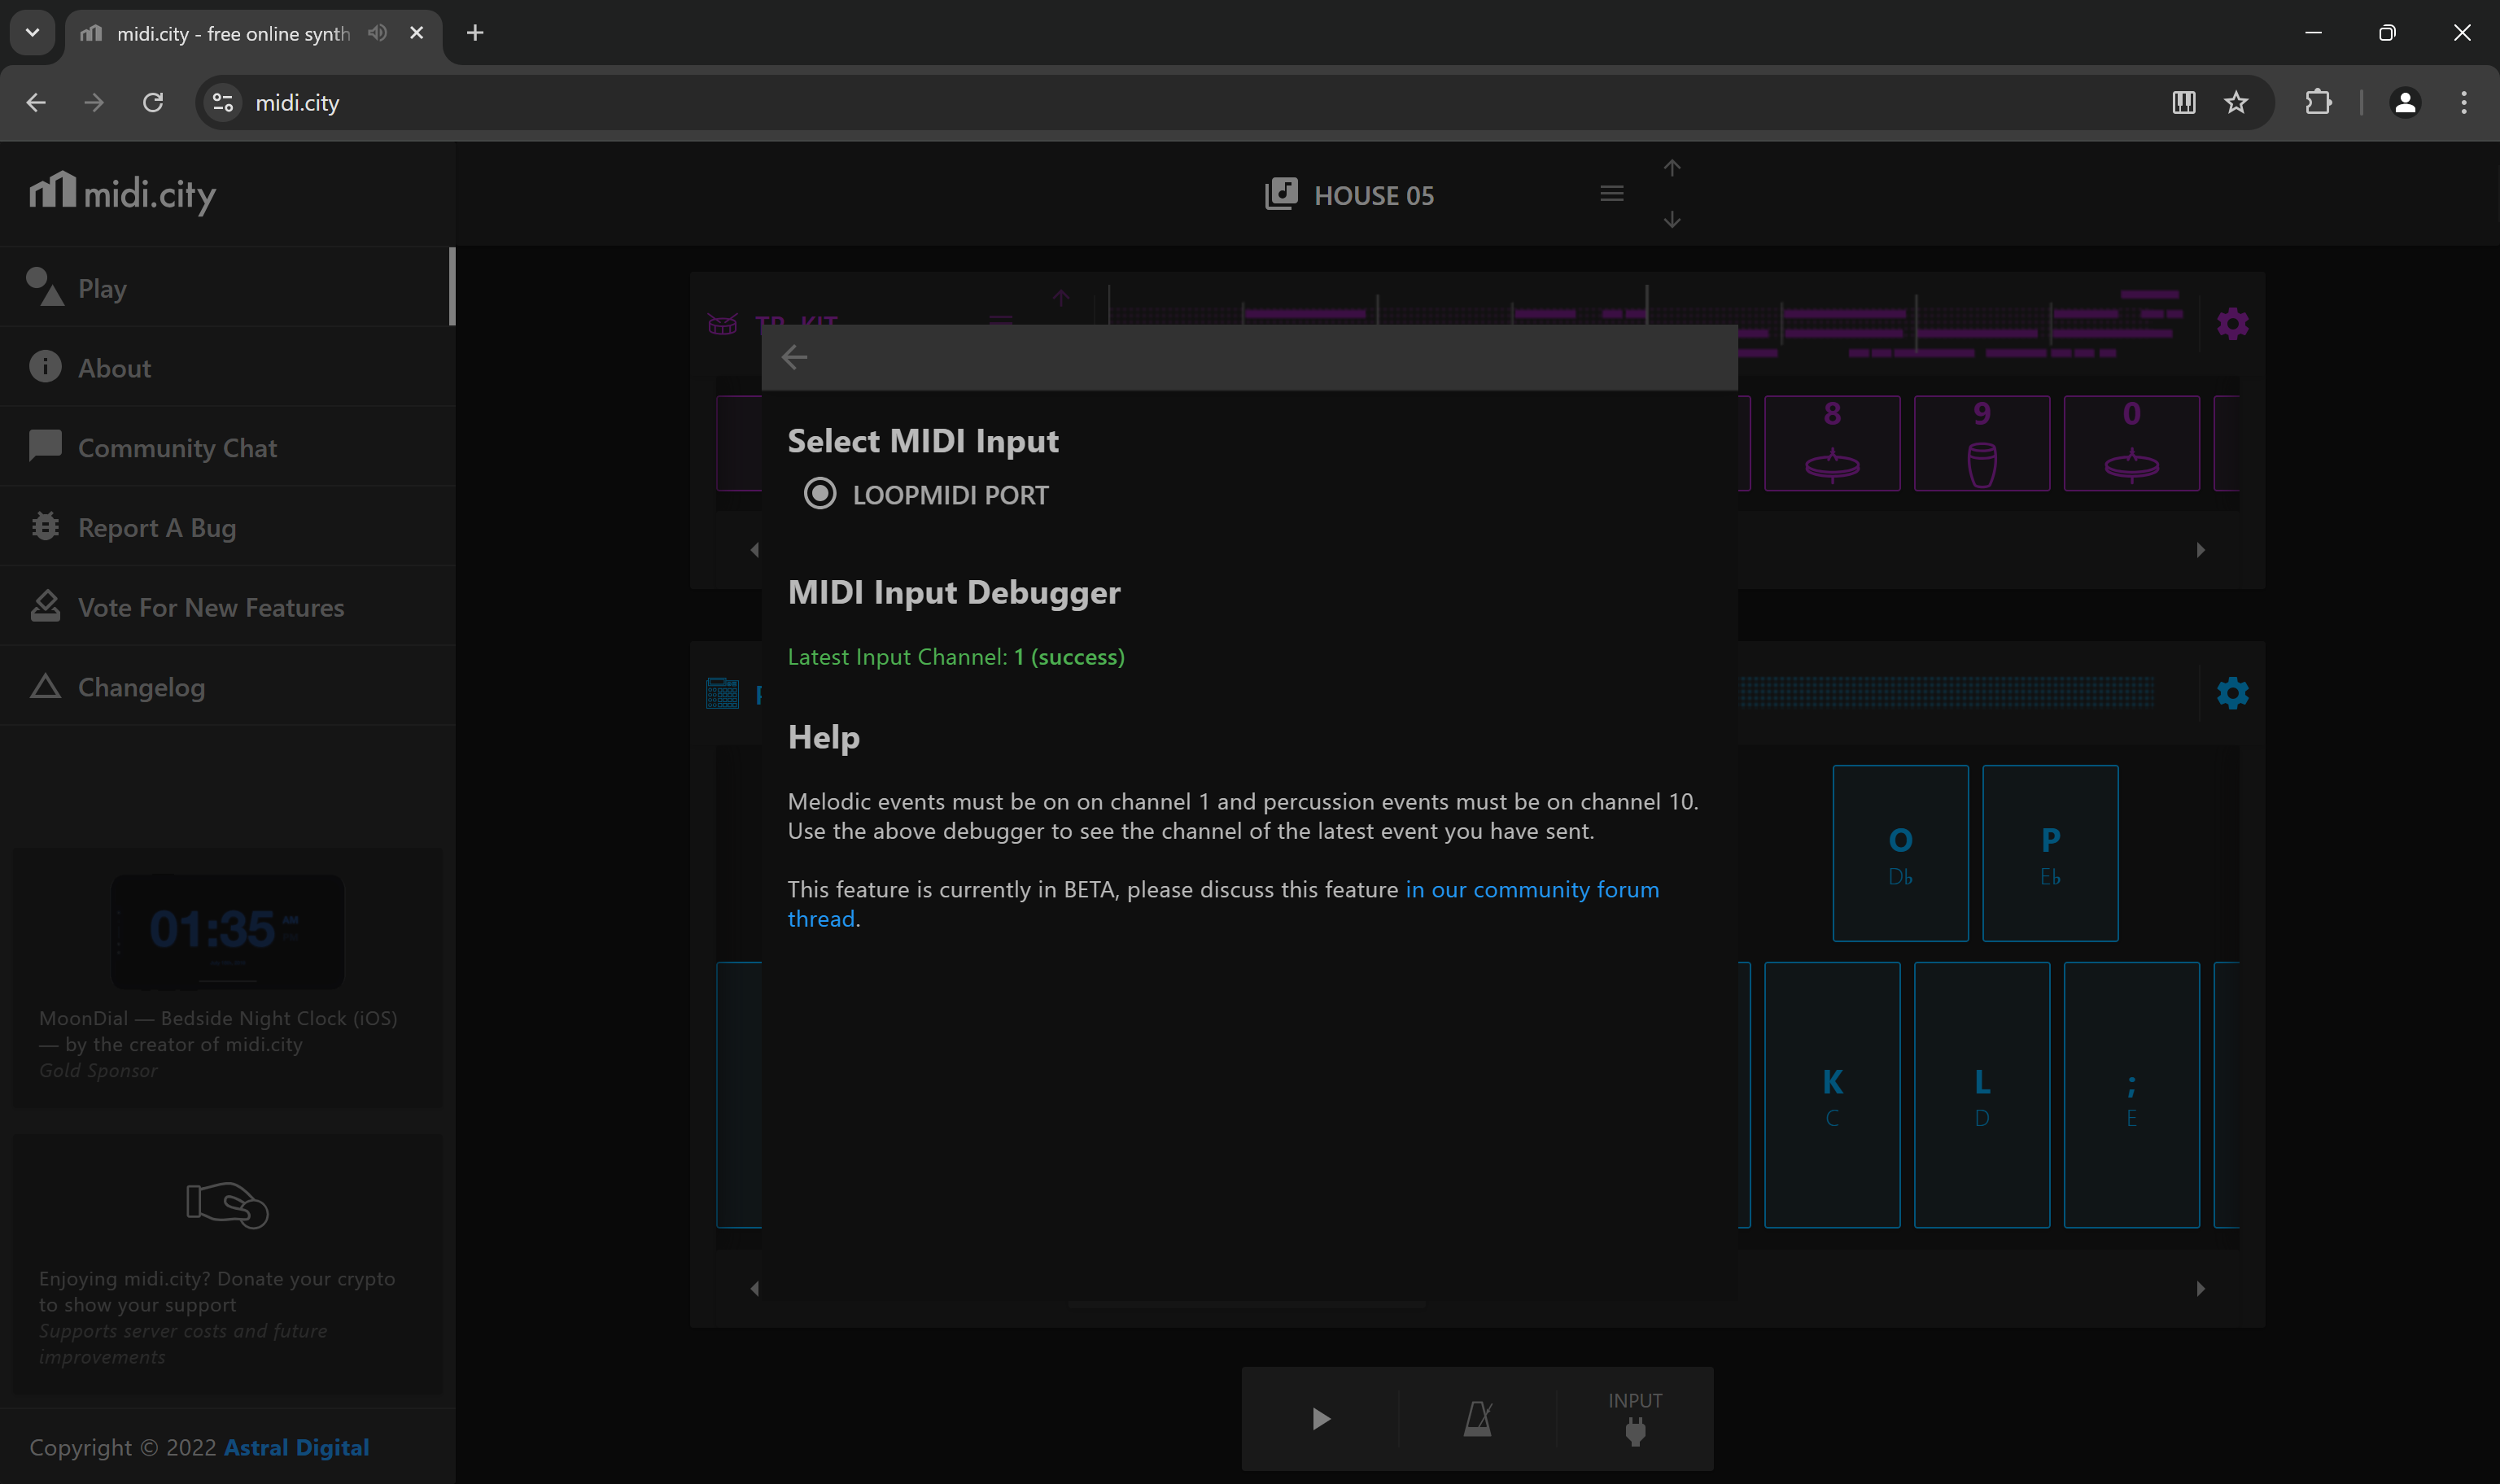
This also works with Ableton. In Ableton select your MIDI device (loopMIDI port) here:

Links
Sending MIDI wirelessly to phone apps
There are multiple ways to turn your MIDI Madness Maker into a Bluetooth MIDI keyboard! The code used for the different examples is the same (MIDI-madness-BLE-keyboard.ino). Here the focus is on sending MIDI to your computer wirelessly.
Libraries (this part you only need to do once)
You need to start by installing the BLE-MIDI library by Lathoub. Make sure you do NOT install the other suggested libraries; if you have additional BLE libraries compilation may fail so uninstall those if you have them :)
Sometimes different versions of boards and libraries cause conflicts with other libraries (this sometimes happens when a new version comes out). To make sure it’s working, these are the library versions that we are using that work with each other.
boards:
| esp32 by Espressif Systems | 3.1.3 |
libraries:
| BLE-MIDI by lathoub | 2.2 |
| MIDI Library by Francois Best, lathoub | 5.0.2 |
To make it work with ESP32, you need to change line 116 in BLEMIDI_ESP32.h (Arduino/libraries/BLE-MIDI/src/hardware/BLEMIDI_ESP32.h). Add .c_str() at the end of the line, so it looks like this: std::string rxValue = characteristic->getValue().c_str();. What you can also do is just replace the entire BLE-MIDI library with this BLE-MIDI folder, there it’s already implemented (just unzip into your Arduino/libraries folder).
MidiMadnessMaker library by Bart Jakobs
Programming genius Bart Jakobs made a nice library to use with the MIDI Madness Maker that sends MIDI notes and CC info wirelessly to your phone apps. Check it out here; there is also a code example.
Alternatively, you can use the BLE keyboard code in the Arduino (Code) folder.
MIDI to Garageband/SynprezFM
This example is based on a tutorial by Rico Kanthatham which you can find here.
Apps
- Android: download MIDI BLE Connect & SynprezFM II. Connect to your device via the BLE app and then go to SynprezFM
- Apple: download Garageband; go to gears > advanced > bluetooth midi devices
Using garageband
You can use the BLE keyboard code example for various keyboards, drums and other instruments, but you may want to change the MIDI notes sent (check the charts below). MIDI CC doesn’t always have an effect.
MIDI CC: https://rfwilmut.net/notes/GBcontrol.html MIDI map for Garageband drums (via https://gist.github.com/igolopolosov/8193f8d3da522969244dda318f21d3fa)
via Reddit:
CC 1 (Modulation Wheel) -> Tremolo (Electric Piano)

CC 7 (Channel Volume) -> Channel Volume

CC 10 (Pan)-> Pan (Channel)
MIDI  Note    Drum Sound
====  ====    ==========
36    C2      Bass Drum 1
37    C#2     Side Stick
38    D2      Acoustic Snare
39    Eb2     Hand Clap
40    E2      Electric Snare
41    F2      Low Floor Tom
42    F#2     Closed Hi Hat
43    G2      Mid Floor Tom
44    Ab2     Pedal Hi-Hat
45    A2      High Floor Tom
46    Bb2     Open Hi-Hat
47    B2      Low-Mid Tom
48    C3      Hi Mid Tom
49    C#3     Crash Cymbal 1
50    D3      High Tom / Maracase
51    Eb3     Ride Cymbal 1
52    E3      Flat Snare / Accent Drum
53    F3      Bass Drum 2

After this point drums are completely situational

54    F#3     Splash Cymbal
55    G3      Cowbell
56    Ab3     Tabourine
57    A3      Vibraslap
58    Bb3     Anything
59    B3      Vibraslap 2


Links
Examples
Older
Newer