2. Software setup
Setting up the Arduino IDE
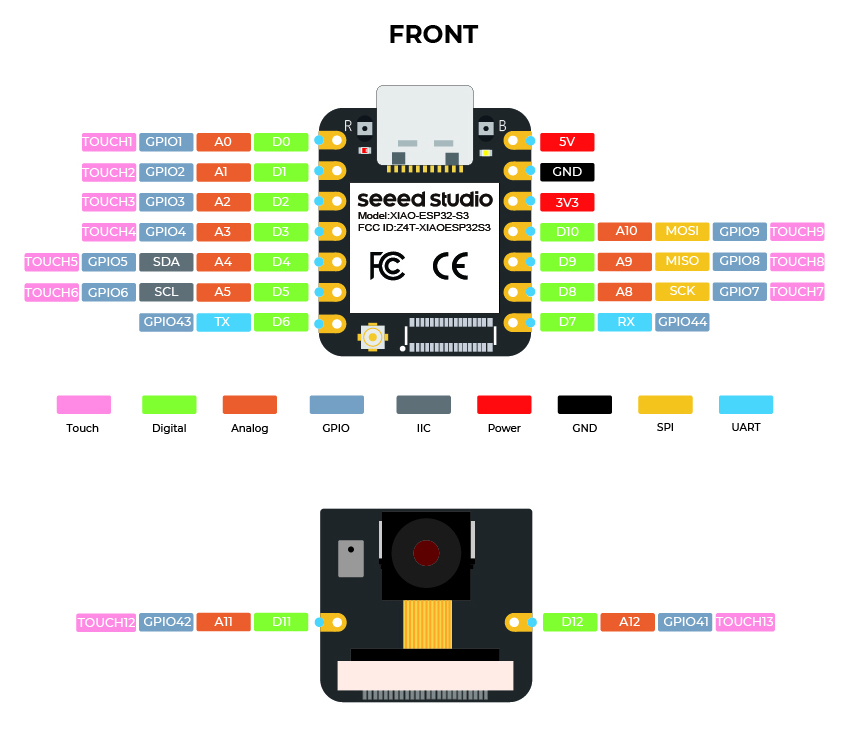
In these examples we’re using a Seeed Studio XIAO ESP32S3. Their wiki is a great place to get started with all of the possibilities this tiny development board has to offer.
We have just built our DIY KIT, now let’s program it!
Step by Step Software Setup
Step 1: Installing Drivers
Because we are using the XIAO EXP32S3, we need to install some additional drivers so that our computer can understand the microcontroller, and vice versa.
For both Mac and Windows, you can get them here (CP210x VCP Mac OSX Driver or CP210x Windows Drivers). For Mac, it can also work to just follow the steps below and then upload something to your ESP32 for the first time; there should be a prompt to install some drivers at some point.
Step 2: Installing the Arduino IDE
We need to install the Arduino IDE Software. The IDE let’s us code and upload this to the micrcocontroller.
Download the latest version of the Arduino IDE here: https://www.arduino.cc/en/software For Mac or Windows.
Downloading the Drivers from the Arduino IDE
- Navigate to
File > Preferences, and paste this URL in the ‘Additional Boards Manager URLs’: https://raw.githubusercontent.com/espressif/arduino-esp32/gh-pages/package_esp32_index.json - Now, navigate to
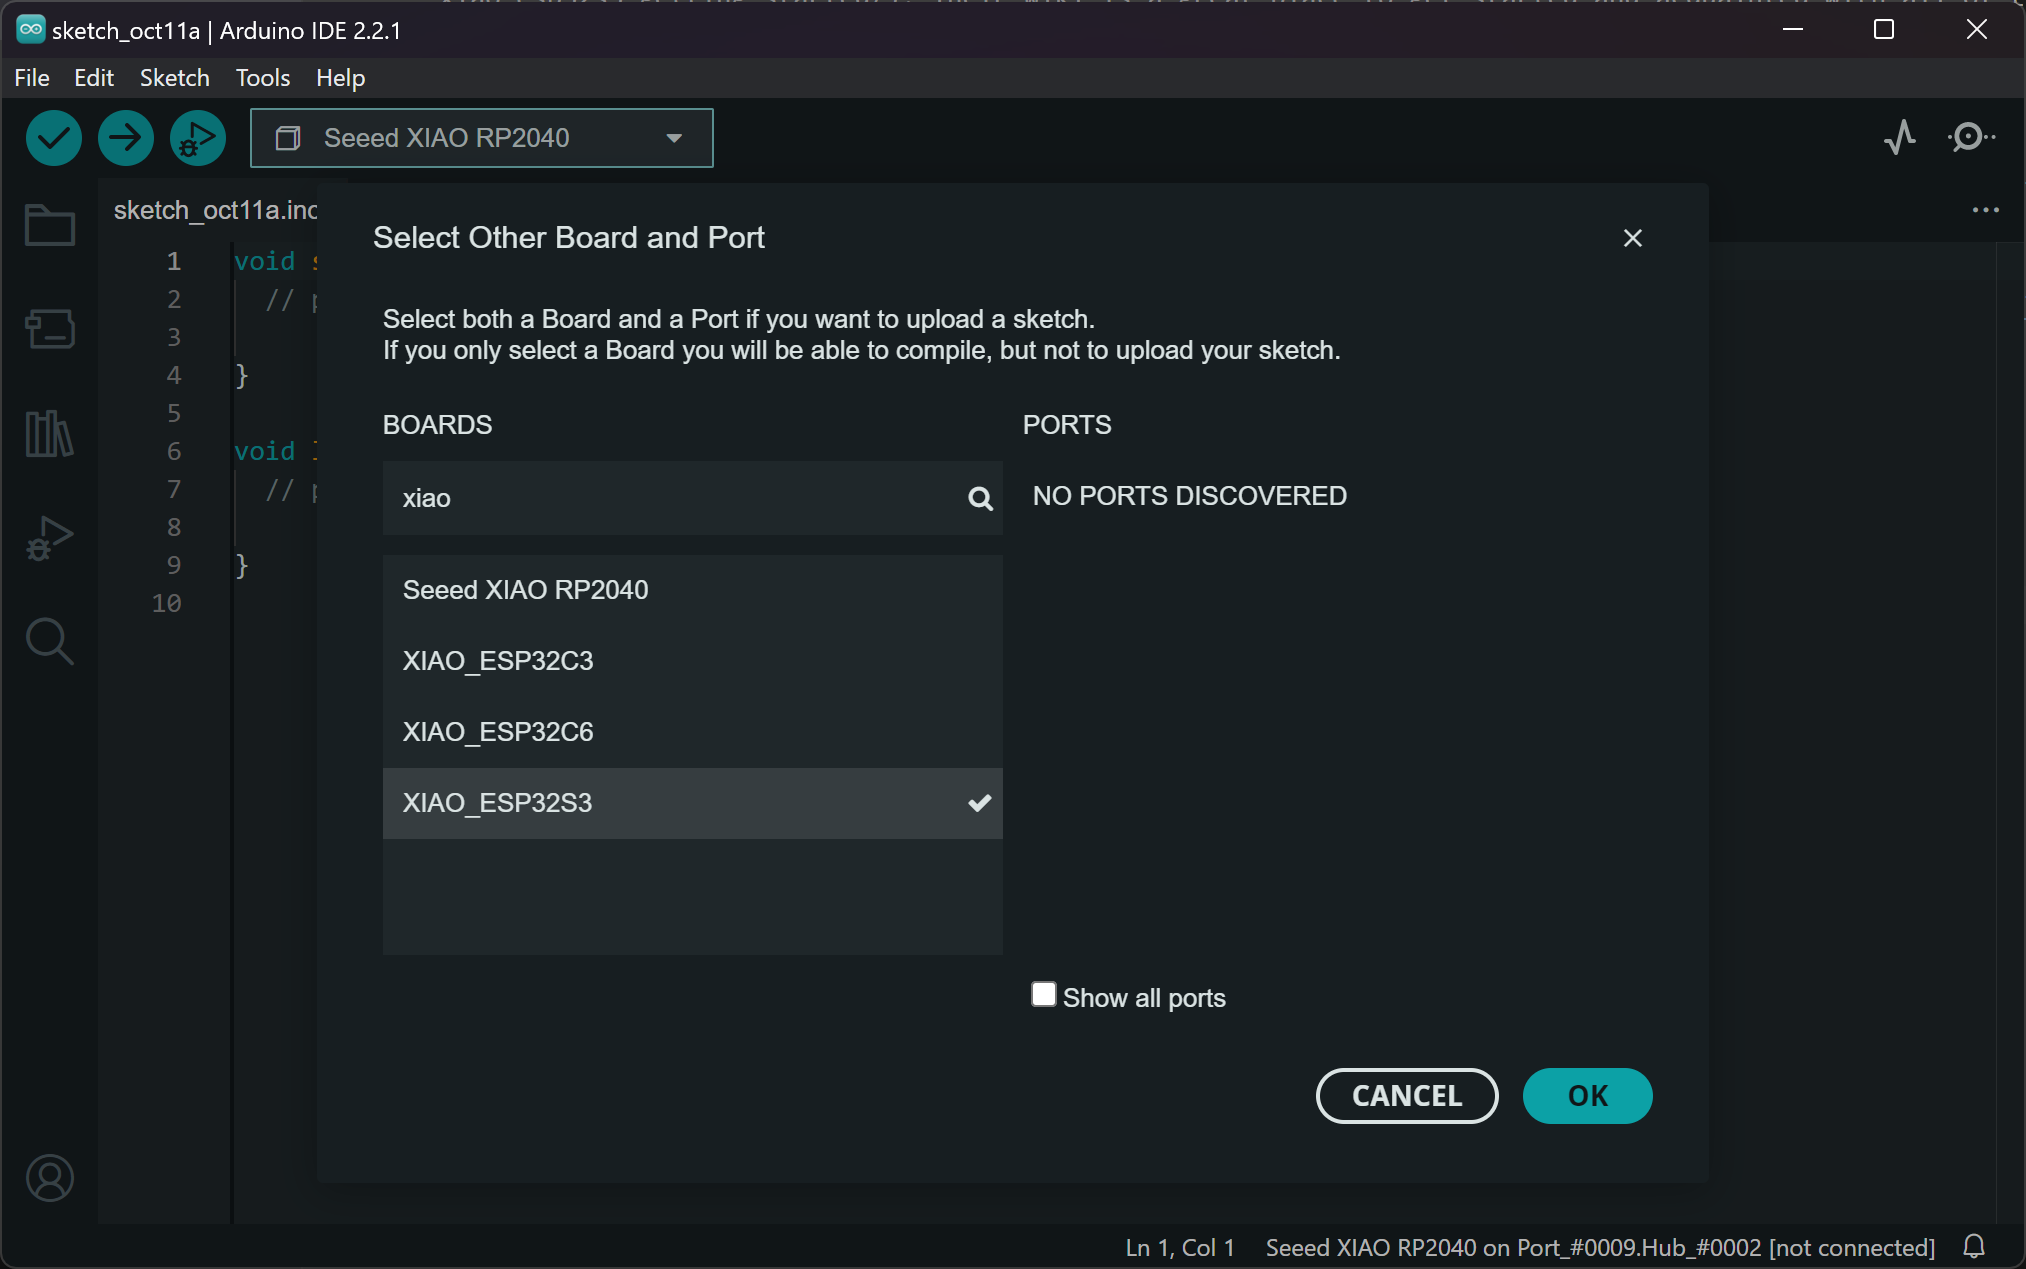
Tools > Board > Boards Manager..., type the keyword “esp32” in the search box, download the latest version by Espressif Systems and install it. - Plug in your board and select the board and port from the dropdown menu in the top left of the interface. Click on ‘Select other board and port’ and look for the XIAO_ESP32S3.
That should be it! Now you can start uploading the example code or write your own. For some code you need to install additional libraries, but you’ll see that in the code.
Code examples
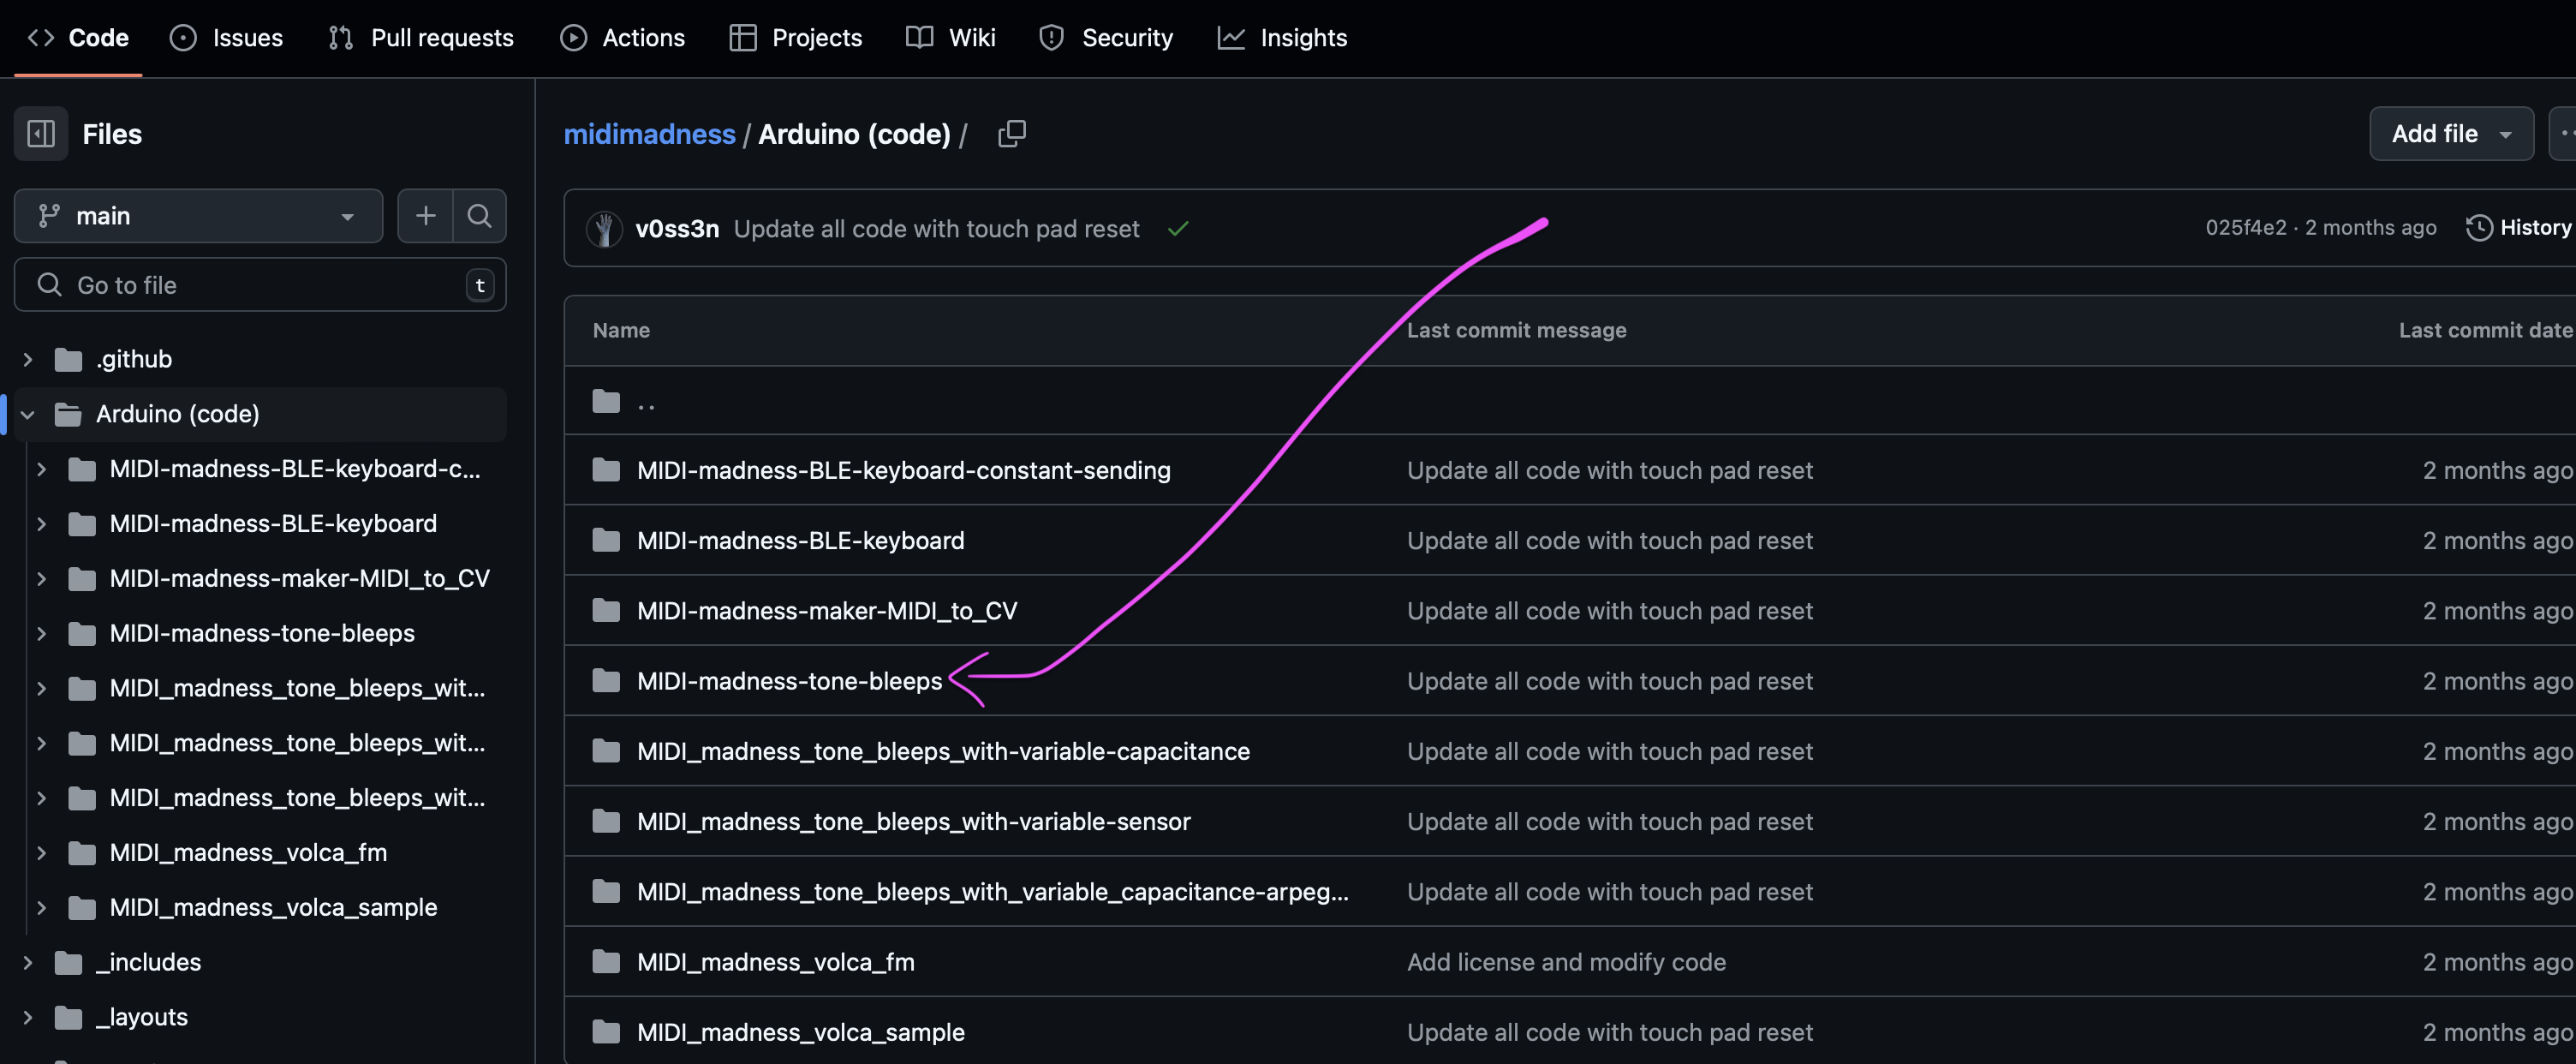
You can find the code examples in the Arduino (Code) folder in the menu to the left.
Step 3: Your First Patch
In the Arduino Code Example Folder, open the Arduino project code named “MIDI-madness-tone-bleeps”. This is a super simple patch, where by touching the touch pads of the Midi Madness Maker, various notes will be played out of the onboard speaker and trough the audio output jack.
You can download the file from github, or copy the code into your Arduino IDE.
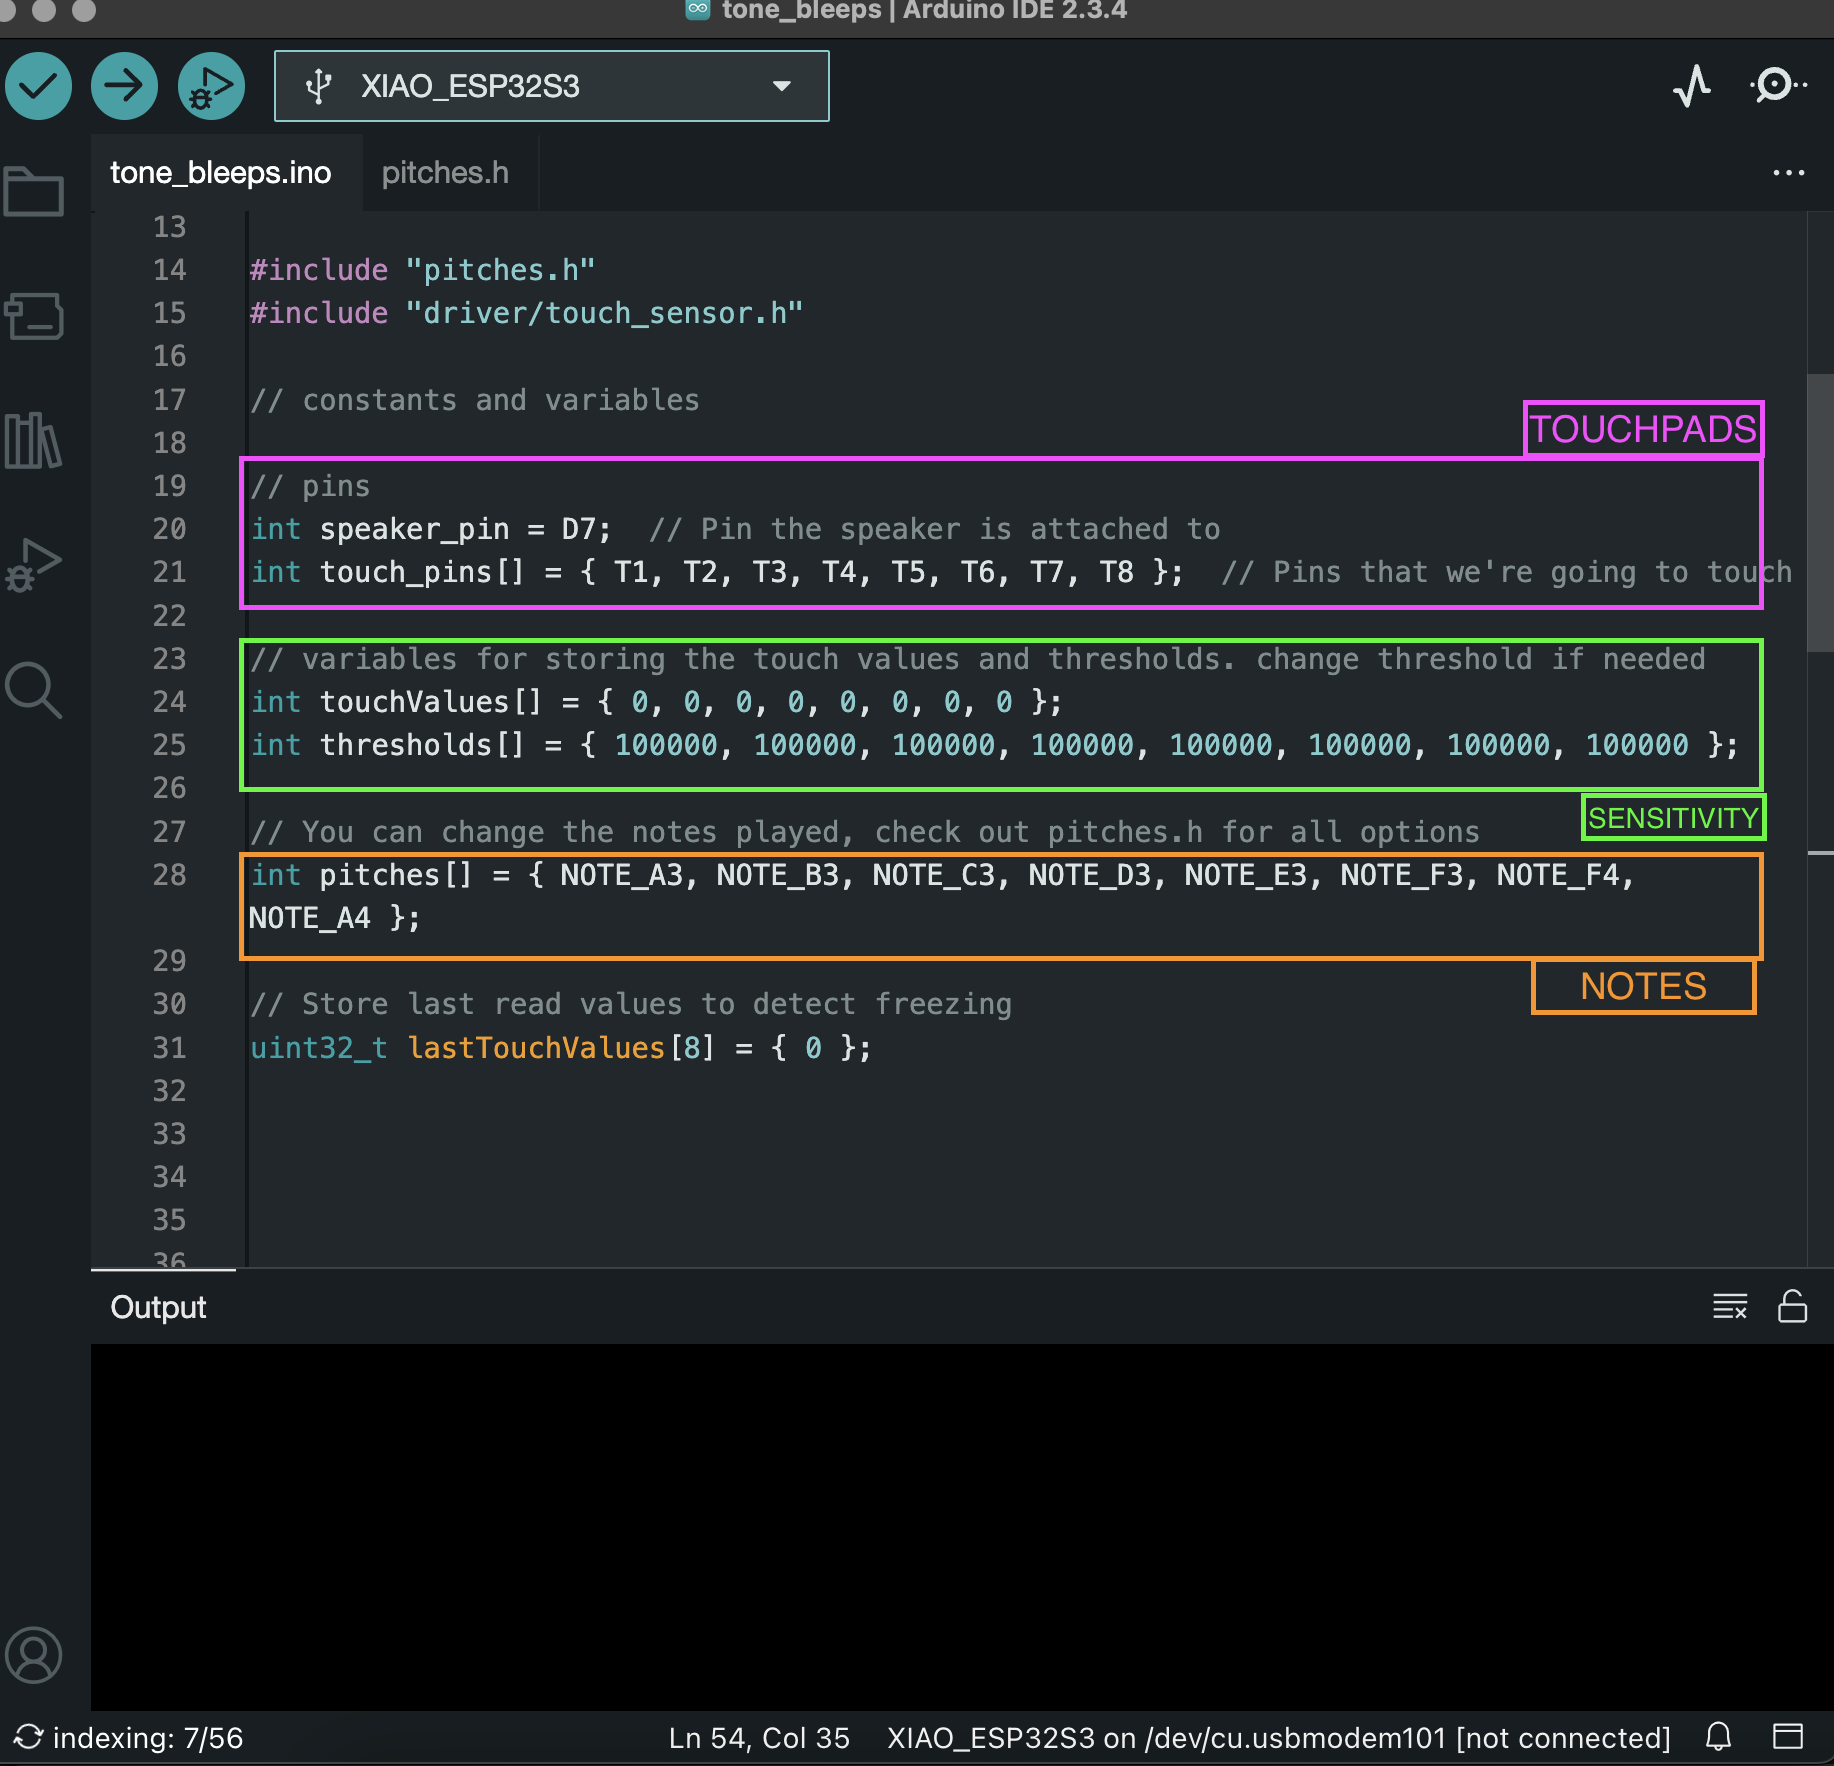
This code is fairly easy to understand. You can change notes to others or change the sensitivity of the touchpads in case you have other things connected to them such as E-textiles or conductive materials.
Next Steps
Now the PC should recognise the microcontroller from the drop down menu and allow us to program further.
Boot mode
One thing to keep in mind with ESP32 is that sometimes they’re suddenly in the wrong mode for programming. You can get back to boot mode by unplugging the board, then pressing and holding down the boot button (has a B next to it) on the board, then plugging it back in. Now it should work again :-)
Libraries
Some code examples need libraries - they’re at the top of the code so check it out there! For the BLE example you need to make a modification; click here for more on that.
Capacitive sensing
If you’re using capacitive touch sensing with the ESP32S3, there is a pretty big chance that the touch pins will freeze at some point. Luckily this is easy to deal with in code, because you can reset the touch pads. The way it detects frozen pins in this implementation is by checking if the 8 values read are the exact same values as read in the previous round. If they are the same, that’s very suspicious, and a very likely indication that the touch pads are frozen. This fix has been made by Bart Jakobs (check out his MIDI Madness Maker library here). The fix is implemented in the example codes, but if you want to implement it yourself you need the following implemented in code to restart capacitive sensing.
Note that this depends on a similar code structure as in the examples to work. You can also start with one of the example codes and adapt it to your needs.
- Above setup: `
#include "driver/touch_sensor.h"

// Store last read values to detect freezing
uint32_t lastTouchValues[8] = { 0 };
-
At the top in the loop:
int samePins = 0; -
In:
for (int i = 0; i < 8; i++) {
uint32_t touchValue = touchRead(touchPins[i]);

    if (touchValue == lastTouchValues[i]) {
      samePins++;
    }
    lastTouchValues[i] = touchValue;
or:
    touchValues[i] = touchRead(touch_pins[i]);


    if (touchValues[i] == lastTouchValues[i]) {
      samePins++;
    }
    lastTouchValues[i] = touchValues[i];
Before final closing bracket of the loop:
  // All of the pins returned the same value, which means probably something is frozen.
  if (samePins == 8) {
    Serial.println("Restarting touch pad...");
    touch_pad_fsm_start();
  }