3D Printing experiments on fabric
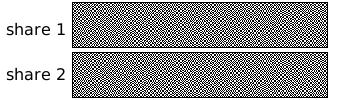
For these experiments I am hiding messages in 3d prints. Visual cryptography is a cryptographic technique which allows visual information (pictures, text, etc.) to be encrypted in such a way that the decrypted information appears as a visual image.
2D image to 3d file
Methods:
- 3D Builder (Windows): especially the stamp setting works great with black and white images
- https://imagetostl.com/: not that great but if you have no other software available to use, a quick and easy method (although the stl files had to be converted for me to be able to use them, not sure if that is an issue for everyone)
- Fusion360 Plugin: Not very usable if you want to use a black and white image to create a stamp, better suited for grayscale images (think landscapes, heightmaps)
- Cinema4D image extrusion: I have not used this method as C4D was not working on my laptop but the method seems very straightforward and easy to use.
Python script
I am using a python script by LessonStudio (https://github.com/LessonStudio/VisualCryptography) to create two separate images that form the original image when placed on top of each other.
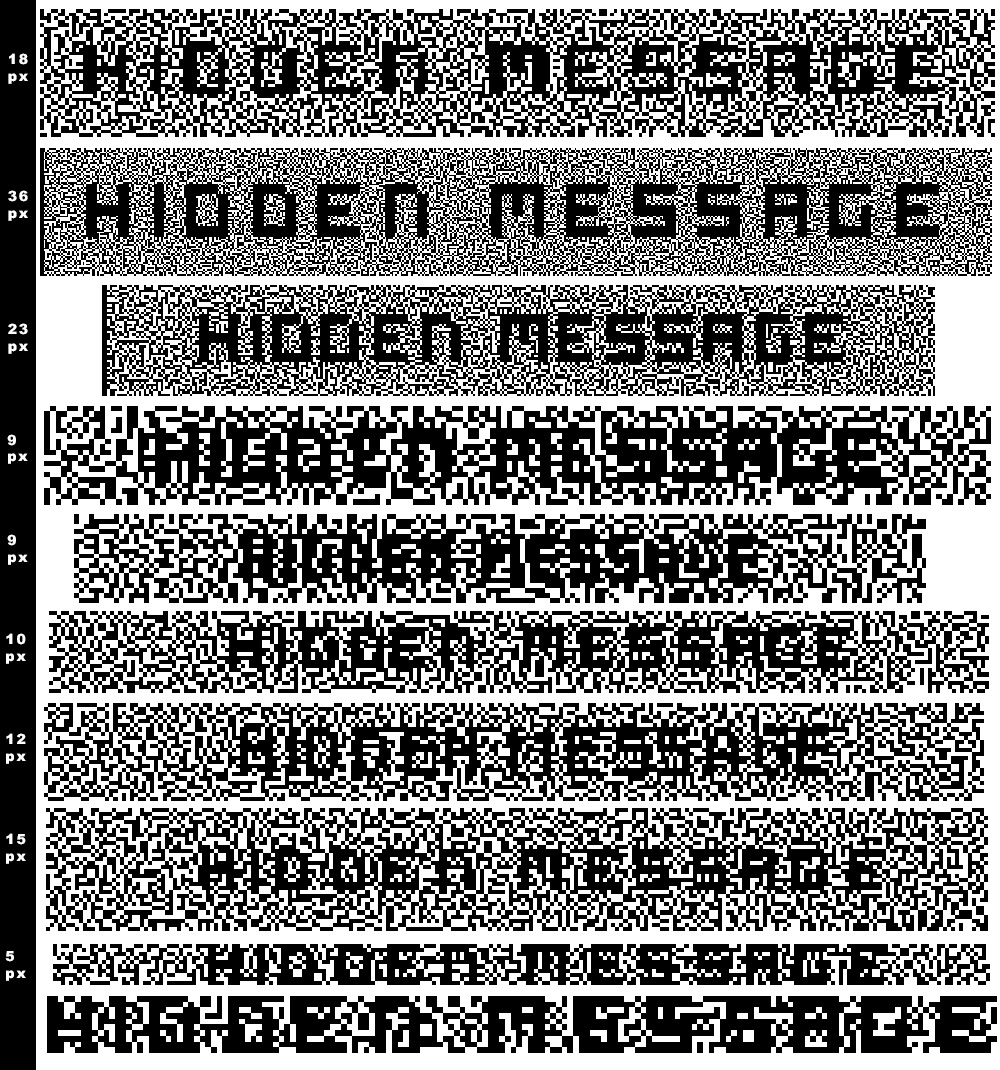
This file takes one argument which is a file that you would like to split into two encrypted images. The original image can only be viewed by overlaying the two encrypted images. If printed on clear plastic, It can be very finicky to align the two images if the pixel count is too high. For best results keep the original image below 200x200 pixels and print as large as possible onto clear plastic to obtain the best results.
You can go to higher resolutions but you then really have to be precise when aligning the two images.
The resulting images will be twice as wide and twice as tall pixelwise and there is only 1 bit colour.
Future features should include alignment marks to make aligning the two transparancies easier.
Maybe I will increase the efficiency of the conversion except that I find that I spend more prep time in photoshop by many orders of magnitude than any time savings that could be extracted.
The reason I built this is that I found many tools out there for doing this that didn’t work for a variety of reasons including being built for long dead versions of Python.
USAGE: python visual_cryptography.py file_to_encrypt.png
Notes:
- This uses an older version of Python (Python 2 instead of Python 3, the current version), so it did not work at first. You need to install Python 2, and use
py -2instead ofpythonto initialize the script.
Legibility tests
First I used the Fusion360 plugin Image2Surface to generate a 3D surface out of the black and white images generated with de Python script. That did not really work as I hoped, it doesn’t really translate the black and white as well as I need. In the images below you can also see the mess it created on PrusaSlicer; the text was not legible at all. After that I tried https://imagetostl.com/ which worked better but I had to save the files as obj or again as stl because PrusaSlicer did not read them. After that I downloaded 3D Builder for Windows which worked perfectly when using the stamp setting, so that is what I am using from now on.
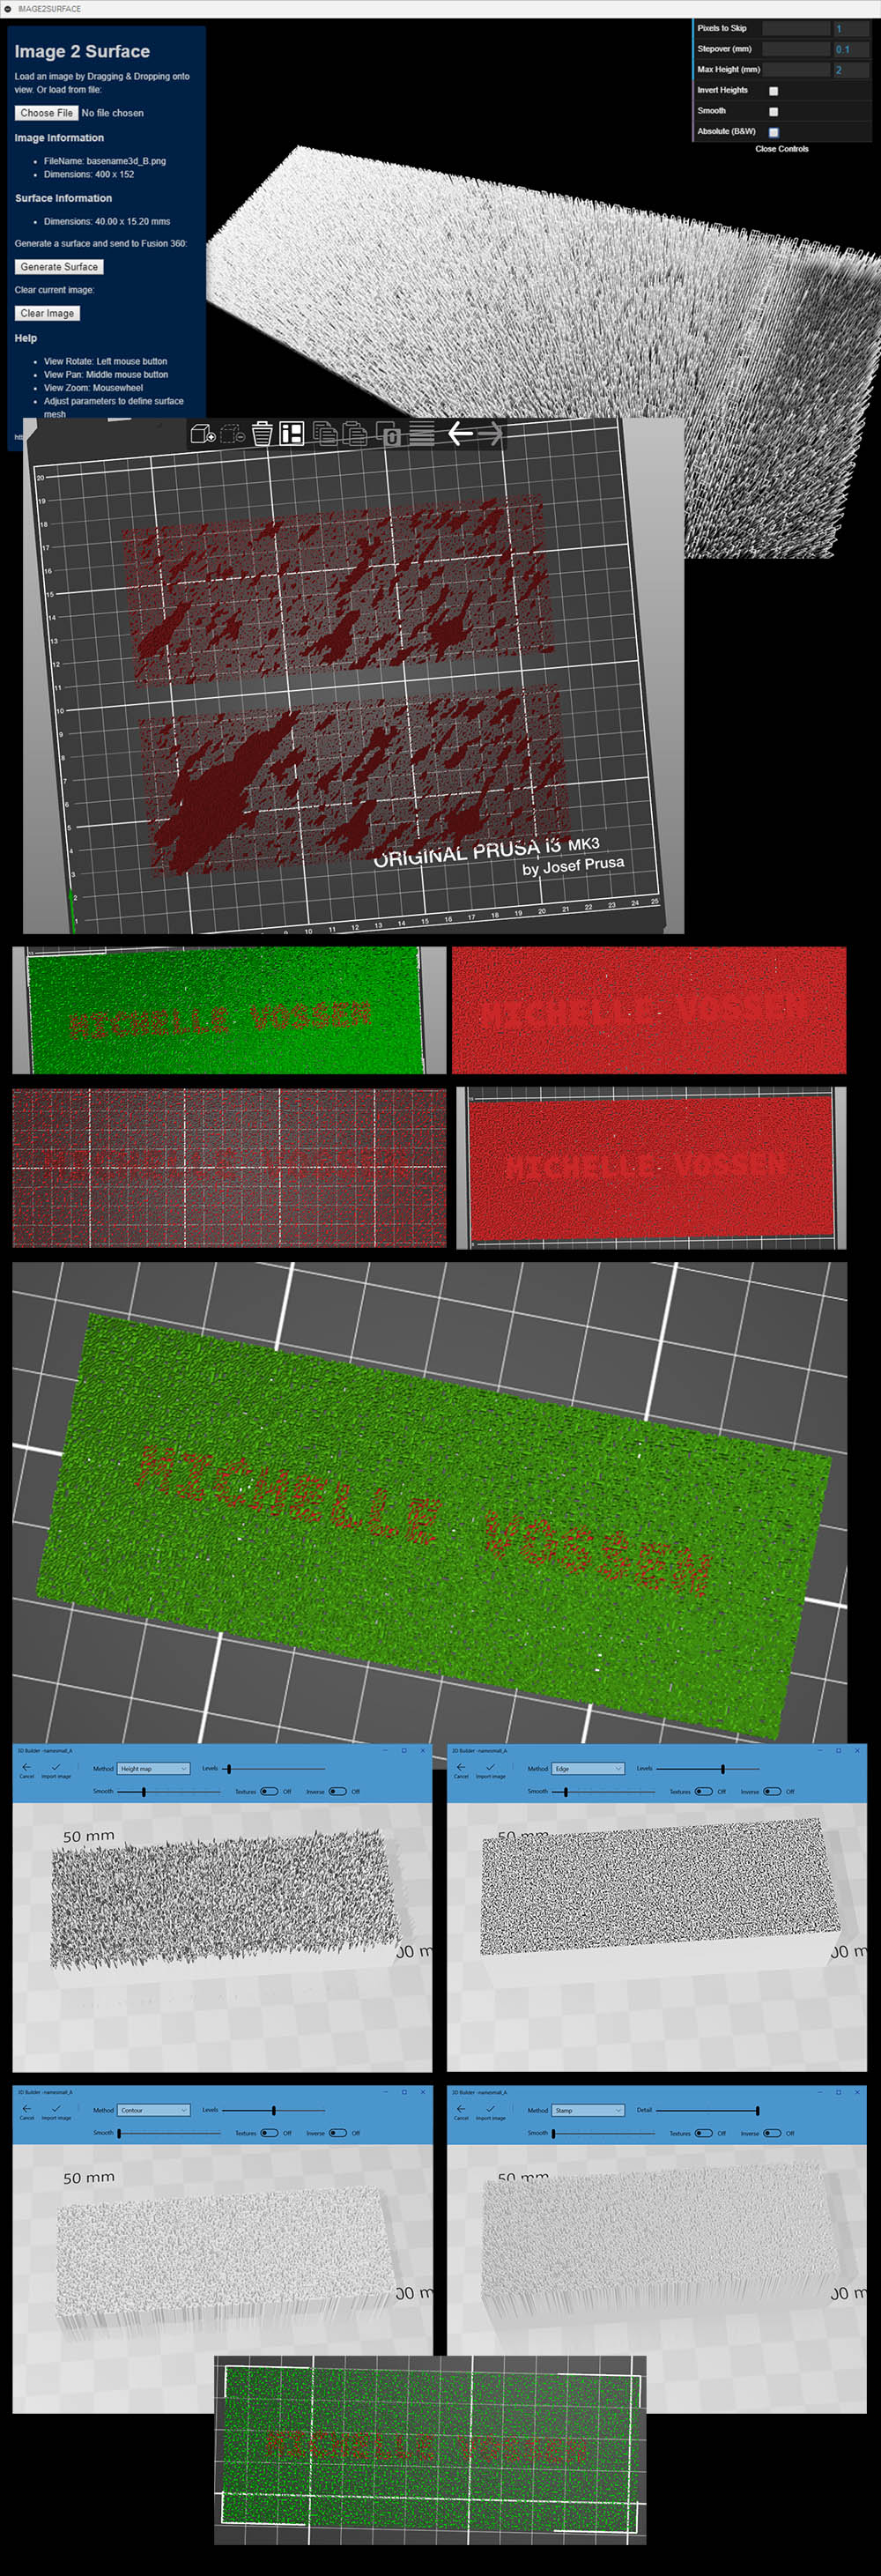
Output
For the first test I used the Image2Surface plugin, which did not work at all so I stopped the print while it was printing the second layer. I used PLA with standard PLA settings (nozzle 215°C, bed 60°C).
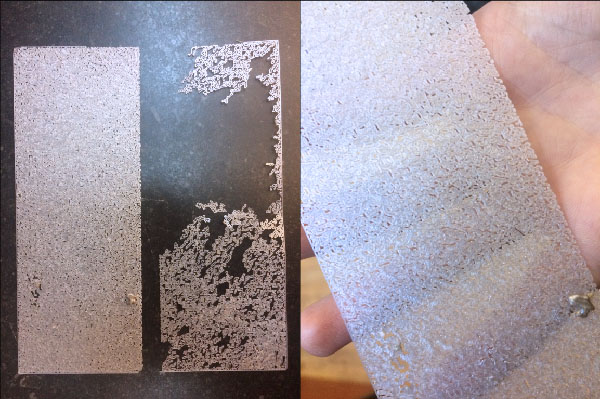
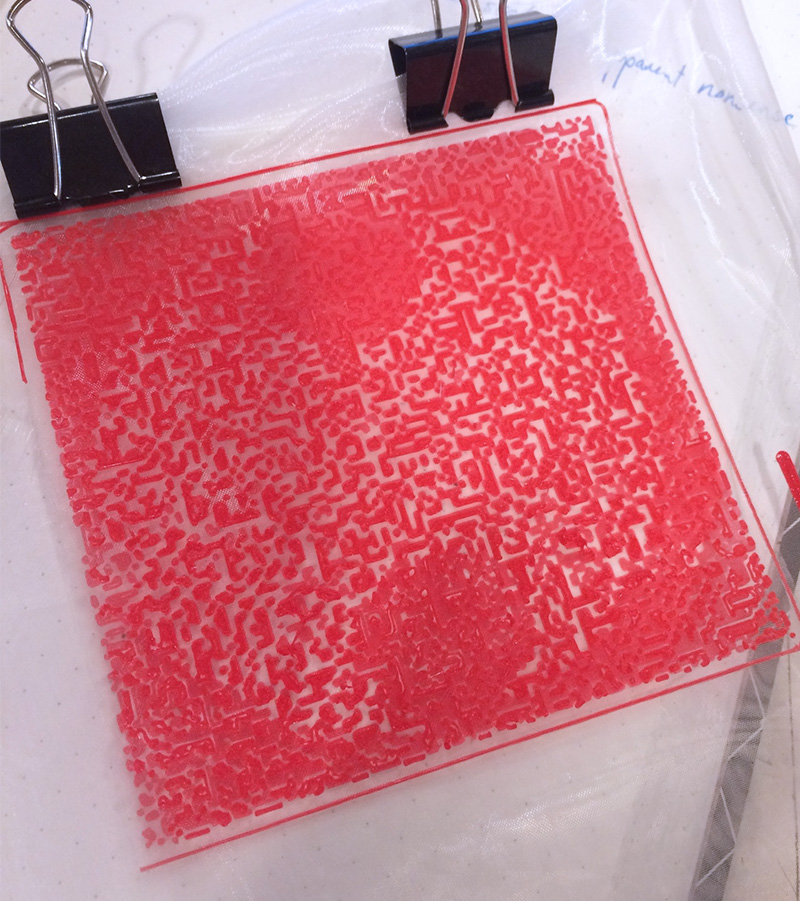
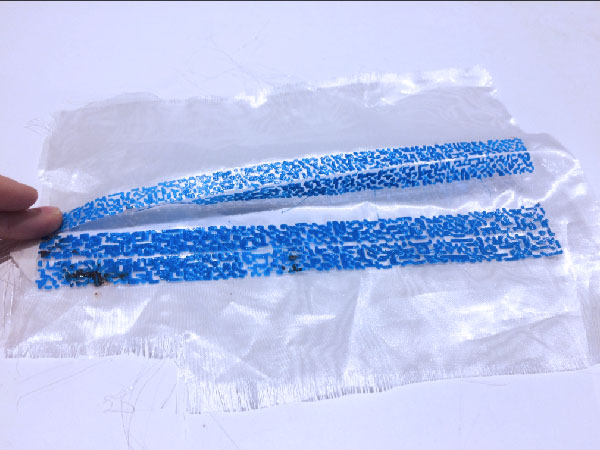
For the second test I used red PLA on see-through polyester, with standard PLA settings (nozzle 215°C, bed 60°C) on the Prusa MK3S. The print started falling off after a while, most likely because the pieces are too small to properly attach to the fabric, and the PLA does not bend with the fabric.
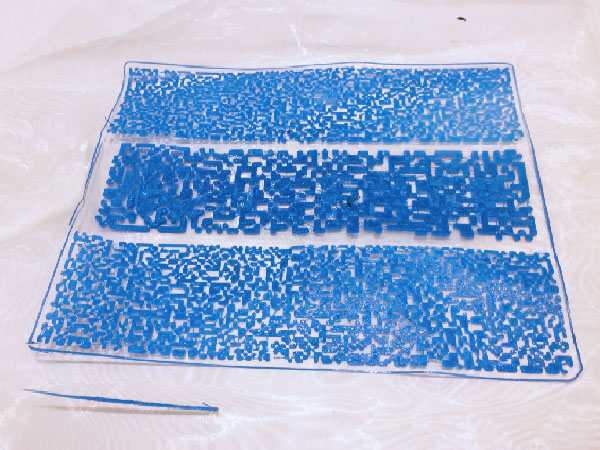
For the third test I used Flexfill on see-through polyester (nozzle 240°C, bed 60°C). This filament attaches itself properly to the fabric but the text was barely legible.
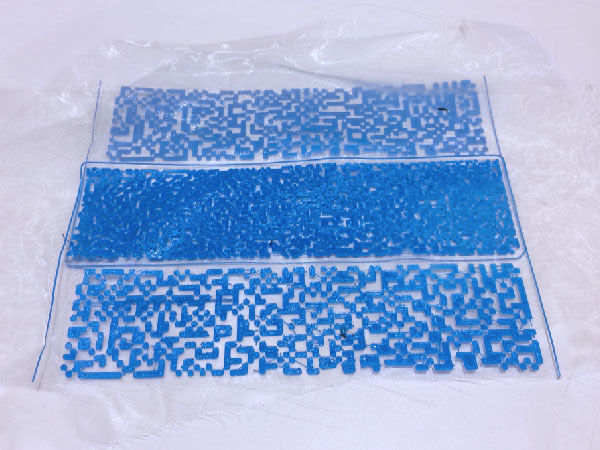
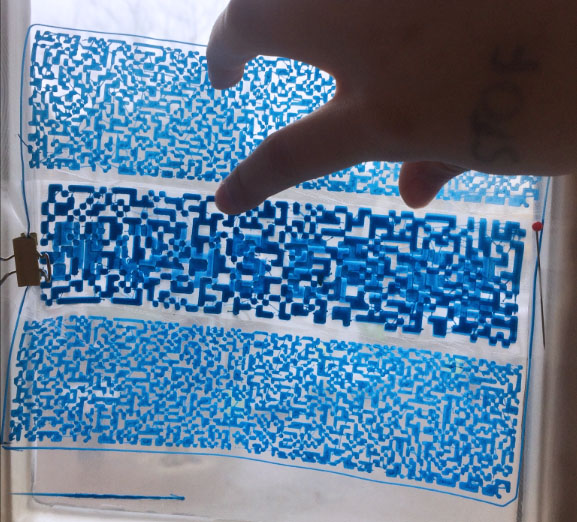
After that I did some more tests to improve legibility but it just does not seem to work with text; anything that is legible on screen becomes one big mess as a 3D print.
Conclusion
- This technique works best with (simple) images
- Text is legible on screens but 3D printed the resolution (the size of the pixels, not the 3d print resolution) has to be low for the print to be succesful (attaching to the fabric layer), which in turn makes the text not legible at all.
- 3D printing does not really do anything beneficial the design, so using visual cryptography as a 2 dimensional print technique on transparent fabrics is a better solution